December 2007
Well its been twelve months since starting this site and its grown quite a bit. A few distractions have stopped me doing any work on the project I hoped to report the most on, my CNC router rebuild. However some benefits have come from detailing the design procedures I have used in the form of the Blender Precision Modelling tutorials. This month I have decided to combine the Web pages into a .pdf book. It isn't until you bring together all the individual web pages, that you realize just how much work has been covered this year. The book consists of 151 pages with 613 images and follows the same walk through of blenders tools as presented on this site. Only now you can download it and use the information off line. The task of combining all this information was made a lot harder when Word crashed 50 pages into the project and lost the links to 150 images. Fortunately Open Source software came to the rescue in the form of Open Office Writer. which has handled the large document size admirably and also allowed me to convert it to a .pdf within the program.

Precision Modelling PDF Guide [No longer available]
After reporting the completion of my home extension and approval by the Building Inspector in May this year, I have finally received the Completion Notice. Only eight months to get the paperwork sorted. Had I been on the project full time I could have built it quicker than it took the council to organize the papers.
Finally as it's the season of good will and glad tidings I would like to wish you all Merry Christmas and a Happy New Year and look forward to some new Blender projects in 2008.
November 2007
The last couple of months have seen me get distracted from my engineering projects. Quite a lot of time has been spent learning some more of Blenders texturing methods, with the UV mapped textures being used to good effect on the Placka image. To paint the texture I used the Gimphoto build of Gimp, which has allowed me to completely, replace Paint Shop Pro in my work flow. The best open source programs are now able to compete head on with professional packages.

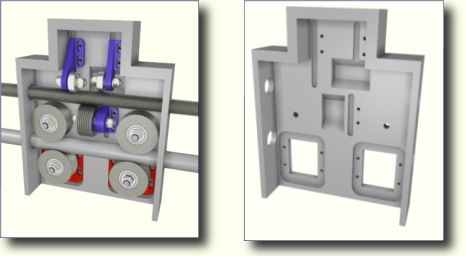
This month I have got stuck in to completing the Engineers Guide to Blender. This final part of the series of tutorials, details how to accurately position components to build assemblies of parts and uses the geometry of the component assembly, to construct the casting around them. The finished component assembly will form the X-axis slides of my router. Most of the techniques needed to do this have been covered in previous parts of the guide, so this section forms more of a discussion of the principals, rather than a step by step tutorial.
The Guide now contains enough information to get anyone started in the process of modelling 3D components and assemblies with Blender. I will keep an eye on the Precision Modelling - An Engineers Guide thread on the Blender Artist Forum. If you have any comments or need things explaining a little clearer post a message on the forum, I tend to check it every couple of days. If there is enough interest posted on the forum, I will compile the guide into a .pdf book.
October 2008
Most of this month has been spent creating the image below of a typical Placka street corner. As I mentioned last month, this is a new direction for my CG skills and has consumed a lot of time learning the basics of texture painting. As a first time try at something like this, I am really pleased with the outcome. There are a few corners that could be knocked off the image, but when its a new venture it's easy to stumble into pitfalls. Had I been more experienced, I wouldn't have created so many sharp corners on the building. However you learn from your mistakes and the next piece I create will benefit from my time spent on this.

On the building front, I managed to find time to complete the warm roof on the back dormer. With the extra insulation added this year, the comfort levels in the house has increased substantially and I am expecting a good reduction in the amount of energy needed to keep the house warm. The dining room also got same treatment with a new warm roof and high specification roofing felt. There are a few new photos in the construction projects section. So that's my bit towards saving the planet for this year.
September 2007
This month I have decided to try and push my graphic skills in a new direction. Until now all of my projects have evolved around detailed modelling work. Another avenue in 3d graphics is to apply detail using textures and mapping images onto the model. These images are not only used to add colour to the model but variations of the image can be used to add subtle bump details, alter the specularity in different areas of the model and loads of other parameters that can refine the appearance of the model. All this started after a meeting in Athens, Greece. I enjoyed the cafe culture in the Plaka (old town) area of Athens, so I have decided to try and recreate a scene from one of the streets. The first building is about complete. I imagine its going to be a lot of work recreating a whole street. I have started a thread on Blender Artist's, Work in Progress section where I will be updating the progress I am making with this project. Link to it is here Plaka (Old Town Athens).

On this site I have added another image in the gallery, this time the watch I modelled last month has been added to a display box. I have also posted some images in my CG Society portfolio. I finally felt I had got some images worthy of posting on this professional site.

There is no engineering work added this month, those projects are on hold until I have finished the construction work on the back of the house. I have though added a couple of new photos in the construction projects section, now I have completed the slating on the back dormer's.
August 2007
ts been a busy month for me with a number of work's meetings in London and Galway Ireland, keeping me away from home. Even so I have still found time to catch up on building work. The bad summer weather finally broke and we had a few dry days where I could get stuck in to ripping the external shingles and boarding off the back Dormer's. The back walls are now insulated with 100mm of Celotex and fully weather sealed. It just remains to complete hanging the slates between the windows. All that remains on the back of the house is to insulate and re-cover the existing flat roofs.
Even though my time at home has been limited this month it hasn't stopped me getting stuck into another Blender project. I suppose the inspiration came from admiring some very expensive Breitling Aviator watches whilst on holiday. There is no chance of me ever affording a £2000.00 watch so I thought I would have a go at modelling one instead. It turned out quite well for a quick project. I am pleased with the modelling, but again struggled with the metal textures. I might just re-visit this in the winter and see if I can create a brushed stainless steel finish on the main watch body and strap? There are a couple of renders of the watch in the gallery. And a post on Blender Artist Forum

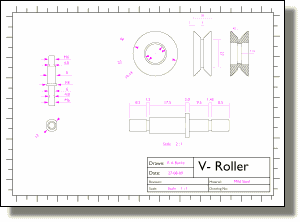
Finally this month I have had a concerted push and managed to complete the final part of the V-Roller Guide tutorial. Because this went over similar ground to Part 11 of the 608 Bearing tutorial it was difficult not just to repeat what I had already covered. For this tutorial I have concentrated on setting up radial dimensions.
The tutorial also touches on using Blenders Node Editor to composite the line drawing, Dimensions and Border together. If you have any comments on the tutorial please feel free to contact me via the post on Blenderartist.org: Precision Modelling - An Engineers Guide to Blender.

July 2007
I had big hopes this month of finishing off some of the external building work. The existing house dormers need to be insulated and warm roofs need fitting over the existing flat roofs. As with all the best-laid plans, something gets in the way and this month it was the weather. What's usually the warmest and driest month of the year, has turned into a "damp squib" with rain almost every day and one of the days we had the equivalent of three months rain. (Typically British, we like talking about the weather. :-P)
The weather may have stopped the external work but that's left a bit more time available to continue work on my Blender Tutorials and CNC project.
A new tutorial has been added based around the design of the V-Rollers that I am planning to make to run along the 18mm steel guides of my router. The tutorial is in three parts.


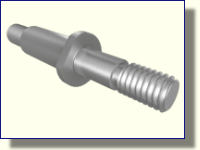
The first part takes two of the 608 Bearing's from the first tutorial and builds the V-Roller around them. The second constructs the axle, nut and washer that holds the assembly together. The third part gives details of how to generate an accurately detailed thread on the axle. A few of Blenders modelling tools not covered in the 608 Bearing tutorial have been incorporated into these tutorials. The techniques used to position the components in relation to one another will also be useful to anyone using Blender for general Modelling. The last part will be to produce the component and assembly drawings, hopefully there will be time next month to complete that one.
June 2007
Firstly, I would like to send out a big thanks to all the people that posted comments or sent Emails about the bearing tutorial. When you start something like this you never know whether it will be useful to others, but the positive feed back has been a great boost and I will definitely carry on making tutorials on the CAD theme.
This month started with a break from writing or technical drawing and I decided to have a go at modelling a trumpet, I'm quite comfortable with modelling in blender and it didn't take to long to produce. On the other hand, obtaining a good golden metallic appearance was a nightmare. It took about twice as long to achieve a reasonable material than it took to construct the model. Textures and materials are something I am fairly weak at and I am looking forward to reading that section of the "Essential Blender Book". If you would like to leave any comments about the trumpet there is a post on Blender Artist Forum.

The month hasn't been entirely without any technical input. I have started blocking out the general arrangement for the CNC rebuild. I am not at the stage to post any details yet, but I do know where I am going with the next few tutorials, which will cover my design thoughts along with some more of the Blender modelling tools not covered in the Bearing tutorial

May 2007
This month had a great start with the Building Inspector passing my extension. Its great when three years of spare time graft come to an end. The benefits of an extra bedroom, study and bathroom are well worth the effort. Because I was no longer under pressure to finish any building work, I thought it would be good to dedicate a little time to finishing my first Blender tutorial. I think I might have got a little carried away, as it's now turned from a basic guide on how to constrain extrusions to a set distance, to a full blown Engineers guide to Blender. With eleven sections it gives a fairly comprehensive introduction, yet barely scratches the surface of the tools available to model with. It possibly gets a little complicated towards the end but hopefully new users will be able to follow it.

Unfortunately my Internet providers web space doesn't support forums or guest books, so I cant answer questions directly from my site.
However if you are struggling with anything in the tutorial, I have a post on the Blender Artist Forum in the tutorials section Precision Modelling - A 608 Bearing where I will look in from time to time and try to help. If you have found the tutorial useful, positive comments in my post in the finished projects section 608 - Bearing may encourage others to have a look.
April 2007
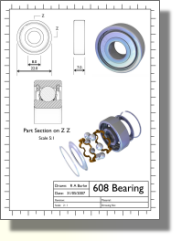
My thoughts this month have concentrated on the redesign of my CNC machine. As I will be using a lot of 608 skateboard bearings, (I estimate around 60) because you can obtain them at a reasonable price from skateboard shops, compared to similar units from bearing factors, I decided to start my design with a model of the bearing. This model has now developed into my first Blender tutorial. Centred around creating dimensionally accurate models, the tutorial goes through the basics of setting out the cross section of the bearings inner and outer race and then extracting the geometry to create the bearing cage etc.

Hopefully it will be a useful starter for new users of Blender that are interested in using this package as an engineering tool. Next month time permitting, I hope to be able to continue the tutorial giving details of how to render the bearing for both visualisation purposes and to produce printable scale dimensioned drawings. Tutorials now include an overview page describing the basics of modelling with precision in Blender.
March 2008
As 3D modeling has been one of my main interests over the past couple of years, I decided this month, I should spend a little time creating a gallery of my images. So in the 3D graphics section, I have posted a gallery containing a few of the images created whilst learning to model with Blender. Its early days for me yet with regards to image creation and as time goes by I intend to learn more about what can be achieved with blender and upload a succession of improving images. As mentioned last month my CNC project needs a revamp and I have been giving some thought to how I can reduce the friction from the original design, without breaking the bank on linear bearings and ball screws. Ill post more on this soon.
February 2007
Its been a busy month with very little time to spend on the web site. I have managed to bring over some of the details from my old sites engineering section and its triggered an idea for a project to improve the CNC router, I'll post more on that in the next few months. The thing thats been taking my time is finishing the home extension. As a starter for the construction section of the site I have added a small gallery of the construction work, I need to take some more photos and up load them now the internals are finished. This month I have also improved the navigation links at the bottom of the pages.
January2007
This is the start of my new site, I have just purchased the domain rab3d.com and I am working on the page layout and navigation. To help get the site populated I will bring over as much useful stuff from my old pottery site. If you have just stumbled across the site please be patient, it will probably be a couple of months before there is a useful amount of information here.


