Mini Tutorial: Animating Curves and Maintaining Good End Tangency.
There are lots of situations in animation that require hoses to deform with the movement of objects. I have used this technique to animate hydraulic hoses on my JCB excavator project, but it is equally suited to most situations where you need a hose to flex a small amount.

Before I start I am assuming you are familiar with the basics of modelling and animation in Blender 2.6X as this mini tutorial only shows the principal of attaching a curve with a "Bevel Object" representing a hose to two hose fittings.
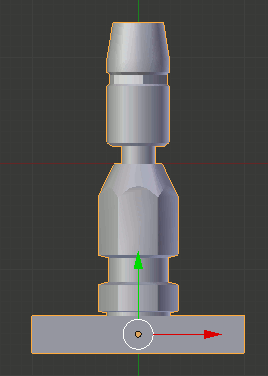
To get started we need something to attach the hose to. For this tutorial I have roughed out a basic hose fitting shape and attached it to a flattened cube as one object called "fitting_001". Notice the origin of the object, as this serves as the rotation point when animating the hose.

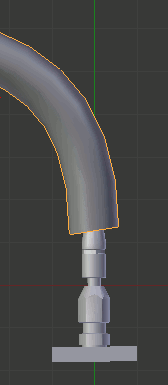
I have duplicated the fitting and rotated the duplicate through 90 degrees.

We now need to add a Bezier curve between the two fittings.

Press Shift-A and select "Curve" from the pop-up menu then select "Bezier".
Tab into Edit Mode and RMB select and Grab the centre handle on one end of the curve and drag the curve handle to the centre of one of the fittings.
Do the same from the other end of the curve to the other fitting.
RMB Select the curve handle marked A, Grab it and rotate it so it is coplanar with the centre axis of the fitting.

Do the same with handle B.

Extend the handles to give a smooth curve from each fitting.
Tab back into Object Mode
Shift-A and select "Curve" from the Pop-up menu, then select "Circle"

This will be used as the Bevel Object to add a hose shape to the curve.
Press S to scale the Circle down to a smaller size.
RMB select the Bezier Curve and go to the Curve Object Data in the Properties Shelf

Click the Bevel Object: field in the geometry panel and select "BezierCircle" from the options.

The curve will now take on the shape of the BezierCircle.

The hose will be either too fat or too this for the fitting, depending on how much you scaled the Bezier Circle.
In the 3D View RMB select the Circle and Scale it so the hose fits the fittings.

You might also want to carefully adjust the position of the ends of the hose in Edit Mode, so they fit just inside the fittings.
That completes making the hose with curves.
The next stage of the process is to attach the hose to the fittings, so that when you move or rotate the hose fittings the hose moves with them.
Rigging For Animation.
Select the hose and Tab into Edit mode.

Select an end handle by RMB clicking on the centre control point A to select it. Control Points B and C will also be selected when you do this.
Press Shift-RMB click on the end control points B and C to deselect them.
We will now add a hook to the Control Point A.
Press Ctrl-H to open the Hooks Pop-up menu and select "Hook to New Object".

An Empty displayed as a cross will be added to the control point.
We now need to Parent the hook to the fitting.
Tab back into Object Mode and RMB select the hook, then Shift-RMB select the fitting.
Press Ctrl-P to open the Parent Menu and select Object.

This now Parents the end of the hose to the fitting via the hook. However the end of the hose, at this stage, will not animate correctly when you animate any movement of the fitting.
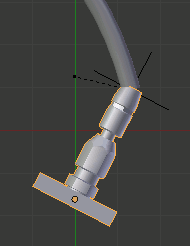
At this point when you move or rotate the fitting the hose tends to crease at the end of the fitting. This can be overcome by setting the end tangency of the hose.

This is achieved by adding another hook to point B of the curves handle.
RMB select the hose and Tab back into Edit Mode. RMB select Control Point B of the handle (see image above)
Press Ctrl-H to open the hooks menu and select "Hook to New Object".
Tab back into Object Mode, RMB select the hook at Control Point B and then Shift-RMB Select the fitting.
Press Ctrl-P to open the Parent Menu and select Object.
Now when you rotate or move the fitting the end tangency is maintained by this second hook.

You now need to repeat this process on the other end of the hose to complete rigging the hose for animation.
3D Computer Graphics Using Blender 2.8 - Modelling Methods, Principles & Practice
If you are enjoying and learning from these tutorials, you might be interested in getting a copy of my book.

The book contains both reference chapters and practical guidance, taking a new or experienced user through the process of modelling a complex spiral staircase from adding the first circle object to finishing with a camera fly through of the completed scene.
The Book contains:
Pages: 506
Images: 915
More details and a chapter by chapter breakdown of the books contents can be found on my Illustration website


