Detail And Spin the Bearing Races
Both sides of the outer race incorporate a rebate and circlip groove in order to hold the dust shields.
The dimensions of the rebate and circlip groove are detailed below.
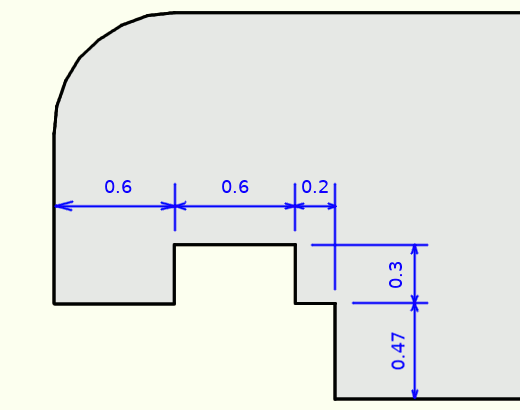
To create the rebate and groove LMB select the bottom left vertex of the outer race and copy it (duplicate) using Shift-D then press Z to constrain the movement of the copied vertex to the Z-axis and then 0.47 for the height of the groove and Enter to accept the move.
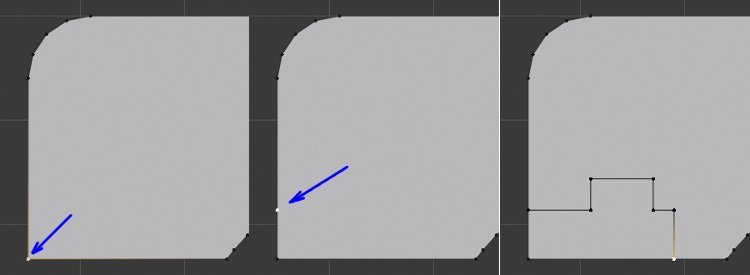
With the duplicated vertex still selected press E to extrude it, then Y to constrain the movement to the Y-axis then 0.6 for the distance to the circlip groove and Enter to accept the move.
Follow this with:
- E Z 0.3 Enter
- E Y 0.6 Enter
- E Z -0.3 Enter
- E Y 0.2 Enter
- E Z -0.47 Enter
This will produce the profile of the rebate and groove shown above.
We can now copy and mirror the rebate and groove across the centre point of the bearing to transfer it to the other side of the outer race.
the rebate and groove are currently separate from the outer race so we can select them using link select.
Move the mouse close to one of the vertices on the rebate and press L for Link select and the profile we have just created will be selected.

Press Press Shift-D to duplicate the profile then Esc to leave it in its current position.
As the Pivot Point is currently set to 3D Cursor and the 3D Cursor is sitting on the centre of the Y-axis we can mirror the duplicated profile based on the current 3D Cursor position.
Press Ctrl-M for mirror then Y for the axis and Enter to accept the mirror operation, the duplicated profile will be moved and mirrored to the other side of the bearing.
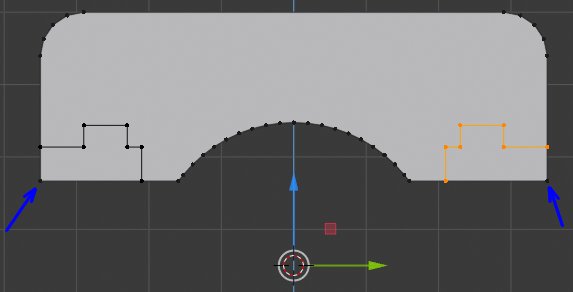
To Join the rebate and groves to the vertices of the outer race we can first delete the two vertices on the inner edge of the outer race indicated with the blue arrows above. Press Alt-A to deselect all vertices then Shift-LMB select the indicated vertices and press X to delete choosing Vertices from the drop-down menu. the vertices and face will be removed.
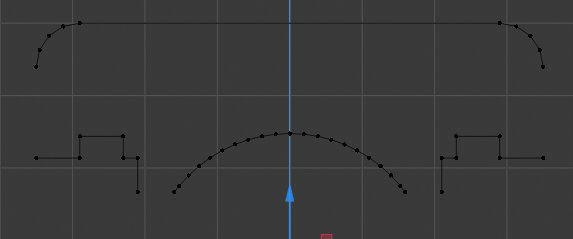
The face is no longer required on the outer race as it would be internal to the 3D model however we need to join the rebate and groove to the rest of the outer race vertices.
LMB select a vertex on one side of a missing edge then Shift-LMB select the vertex on the other side of the missing edge, then press F to join the two vertices with a new edge. Repeat this process 3 more times to join all vertices of the outer race profile. Each edge must be inserted individually as only 2 vertices can be selected to insert an edge. If more than 2 vertices are selected a face would be created.

The inner edge of the inner race has a 0.05mm chamfer. We can use Blenders Vertex Bevel function to create these.

Alt-A to deselect all vertices then Shift-LMB select the two vertices indicated above.
In the Bevel Panel that opens set Width to 0.05 and Segments to 1 and the correct size chamfer will be creatted.
Now the profile of the inner race is complete the face is no longer required. To remove it press A to select all vertices then X for delete and choose Only Faces from the pop-up menu.

We now have the correct profile of the inner and outer bearing race positioned correctly in relation to the centre of the bearing.
the next process will be to spin the profile of the bearing races around the Y-axis. Firstly we need to move the 3D cursor to the Bearings Origin which is located on the centrepoint of the Bearing.
Tab into Object Mode and press Shift-S to open the snap menu and select Cursor to Selected. The 3D Cursor will jump onto the Origin.
Tab back into Edit Mode and press A to select all vertices. then ckick on the Spin Icon in the Tool Panel located on the left hand edge of the 3D Viewport.

A Blue ark will appear centred on the 3D Cursor.
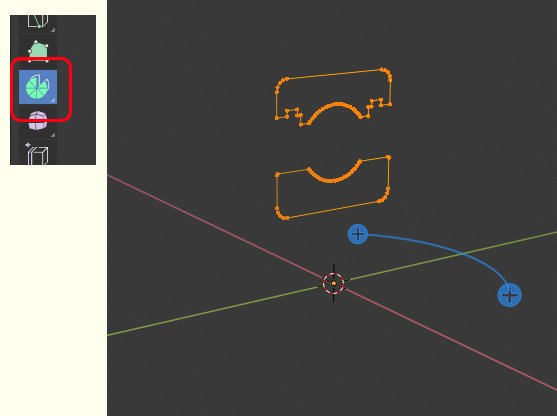
LMB click on one of the blue circles of the ark without moving the mouse and the selected vertices will be spun around the Z-axis. The Spin Panel will also open.

We want to spin the vertices 64 times and 360 degrees around the Y-Axis so in the Spin Panel change:
- Steps to 64
- Angle to 360
- Axis Y to 1
- Axis Z to 0
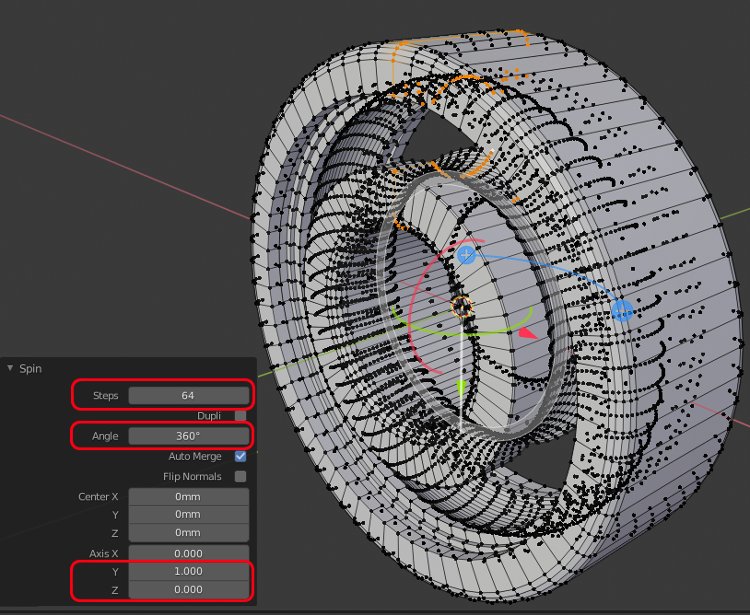
We have now created the inner and outer bearing race.
In the Object panel of the Properties window rename "Plane" to "608-Race"
To change the appearance from the currently faceted surface to a smooth surface, Tab into Object Mode, with the 608-Race selected, from the Header menu choose Object >> Shade Smooth. As the Bearing race has a number of sharp edges these can be protected from the smooth shading by clicking Auto Smooth located on the Normals tab of the Object Data panel within the Properties window
If you haven't already done so press Ctrl-S and save your work as 608_Bearing.
In Part 3 we will add the ball bearings and create the bearing cages.
3D Computer Graphics Using Blender 2.8 - Modelling Methods, Principles & Practice
If you are enjoying and learning from these tutorials, you might be interested in getting a copy of my book.

The book contains both reference chapters and practical guidance, taking a new or experienced user through the process of modelling a complex spiral staircase from adding the first circle object to finishing with a camera fly through of the completed scene.
The Book contains:
Pages: 506
Images: 915
More details and a chapter by chapter breakdown of the books contents can be found on my Illustration website


